#Pound Communications Support Area
Windows -
Live MailThunderBird
Outlook
Outlook Express
Incredimail
Apple -
Mac MailOutlook 2011
Linux -
ThunderBird (POP3 Setup)ThunderBird (IMAP Setup)
Windows:
Windows 8 (With Modem)Windows 8 (W/O Modem)
Windows 7
Windows Vista
Windows XP
Apple:
OS 8.xOS 9.x
OSX 10
OSX 10.8.3
Linux:
Gnome-PPPKPPP
WVDial
For Help, call
1-888-312-1211
MacMail - POP3 Setup
- Step 1
- Step 2
- Step 3
- 4
- 5
- 6
- 7
- 8
- 9
- 10
- 11
POP3 (Post Office Protocol) setup will go out to the mail server and download the emails into your mail client. Once that is done, it'll delete those emails from the server.

Click on the "MacMail" icon.
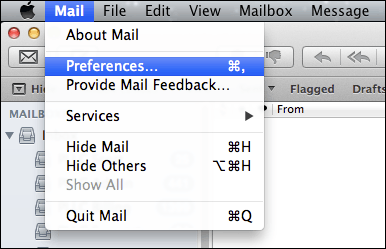
Once MacMail is opened, click on Mail / Preferences.
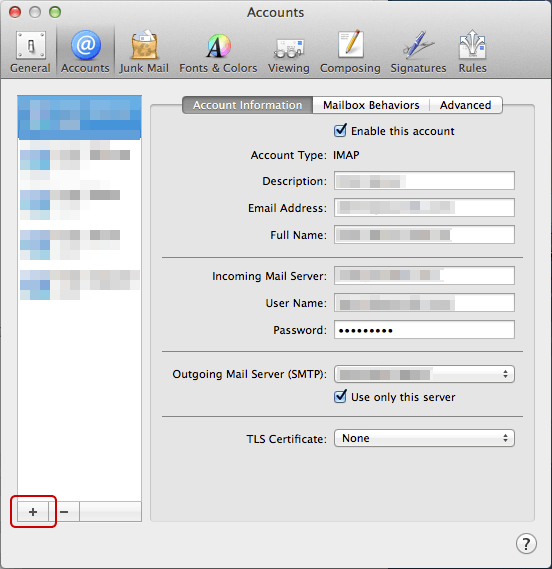
In the "Accounts" window, click on the Plus sign (+) located near the lower-left-corner.
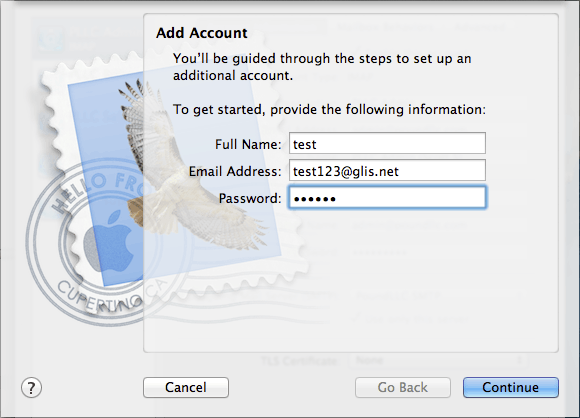
Full Name:
Type in your name.Email Address:
Type your email address.Password:
Type in the password used for your email address.Click the "Continue" button.
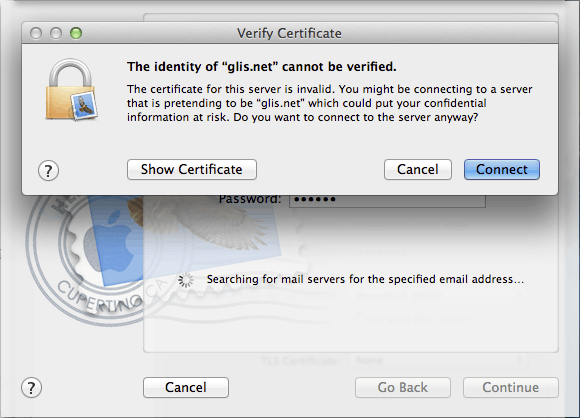
This window may pop-up. Click the Connect button.
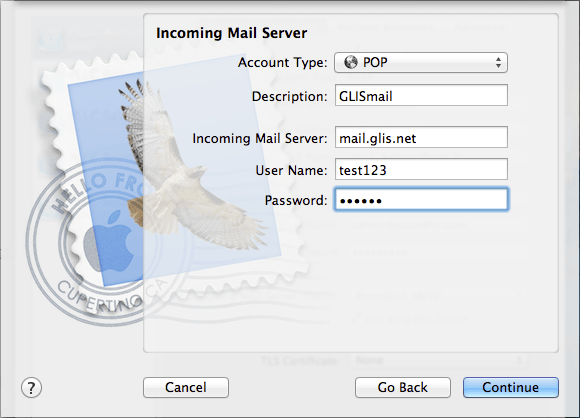
Account Type:
POPDescription:
PoundLLCIncoming Mail Server:
mail.mailconfig.netUsername:
Type in your email addressPassword:
Type in the password used for your email address.Click the Continue button.
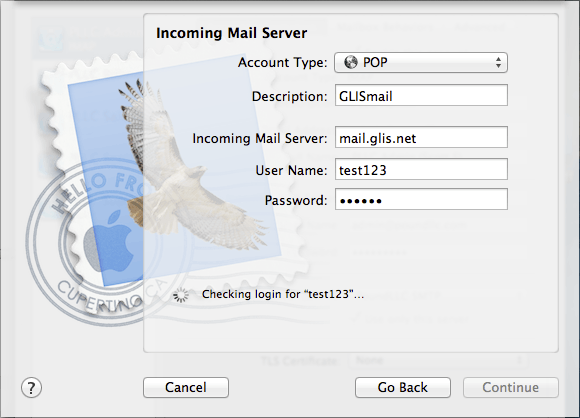
After clicking "Continue", this window will appear.
Let it finish checking the information.
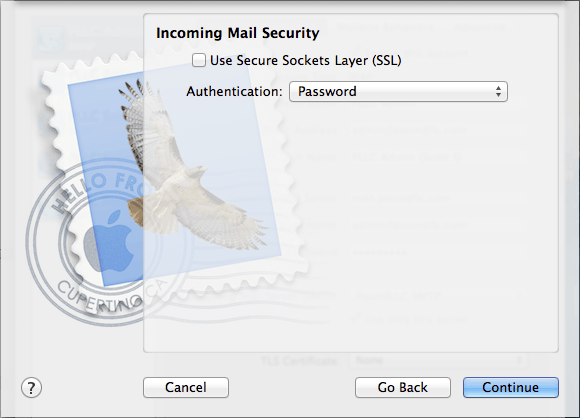
Uncheck - Use Secure Sockets Layer (SSL)
Authentication:
PasswordClick the Continue button.
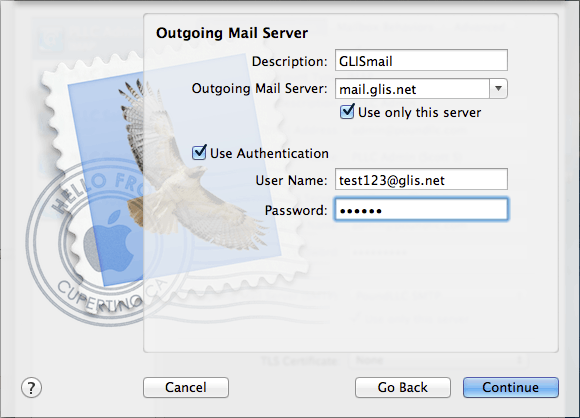
Description:
PoundLLCOutgoing Mail Server:
mail.mailconfig.netCheck - Use only this server
Check - Use Authentication
Username:
Type in your email addressPassword:
Type in the password used for your email address.Click the Continue button.
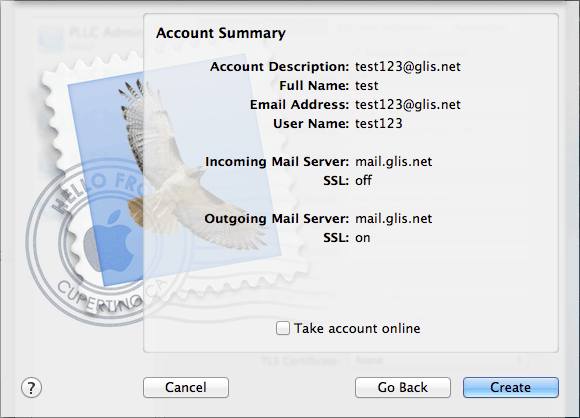
Verify the account information, if correct, click the Create button.
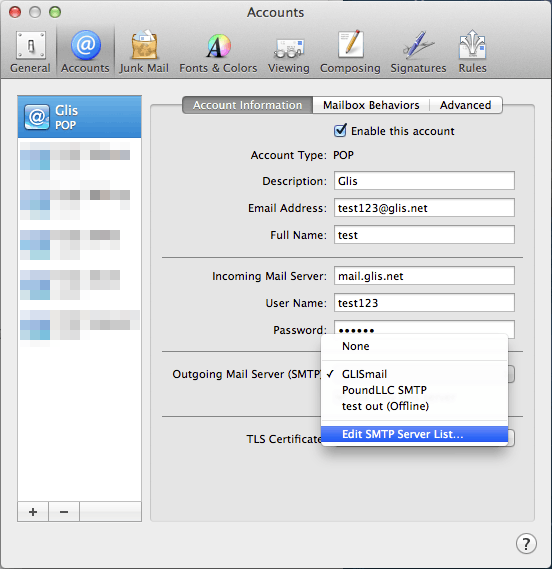
After clicking "Create", you'll be at this window.
If not selected, select Glis in the left-hand column.
In the Outgoing Mail Server (SMTP).
Drop the list down and select Edit SMTP Server List...
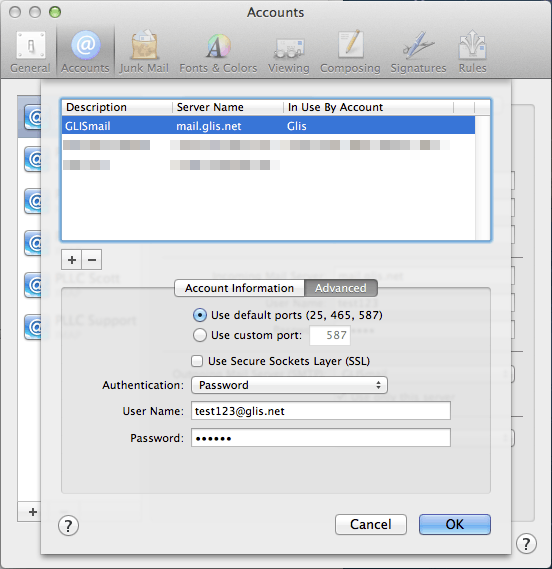
In this window, select the mail.mailconfig.net account.
Click the Advanced button.
Uncheck - Use Secure Sockets Layer (SSL)
Drop the list down on Authentication and select Password.
Click the OK button and close out of the Accounts window.
That's it!